
Custom Solutions
How to Design Your Dream Shipping Container
What to decide, in what order, and why. Then lay it out in a free 3D container builder before anyone cuts steel.
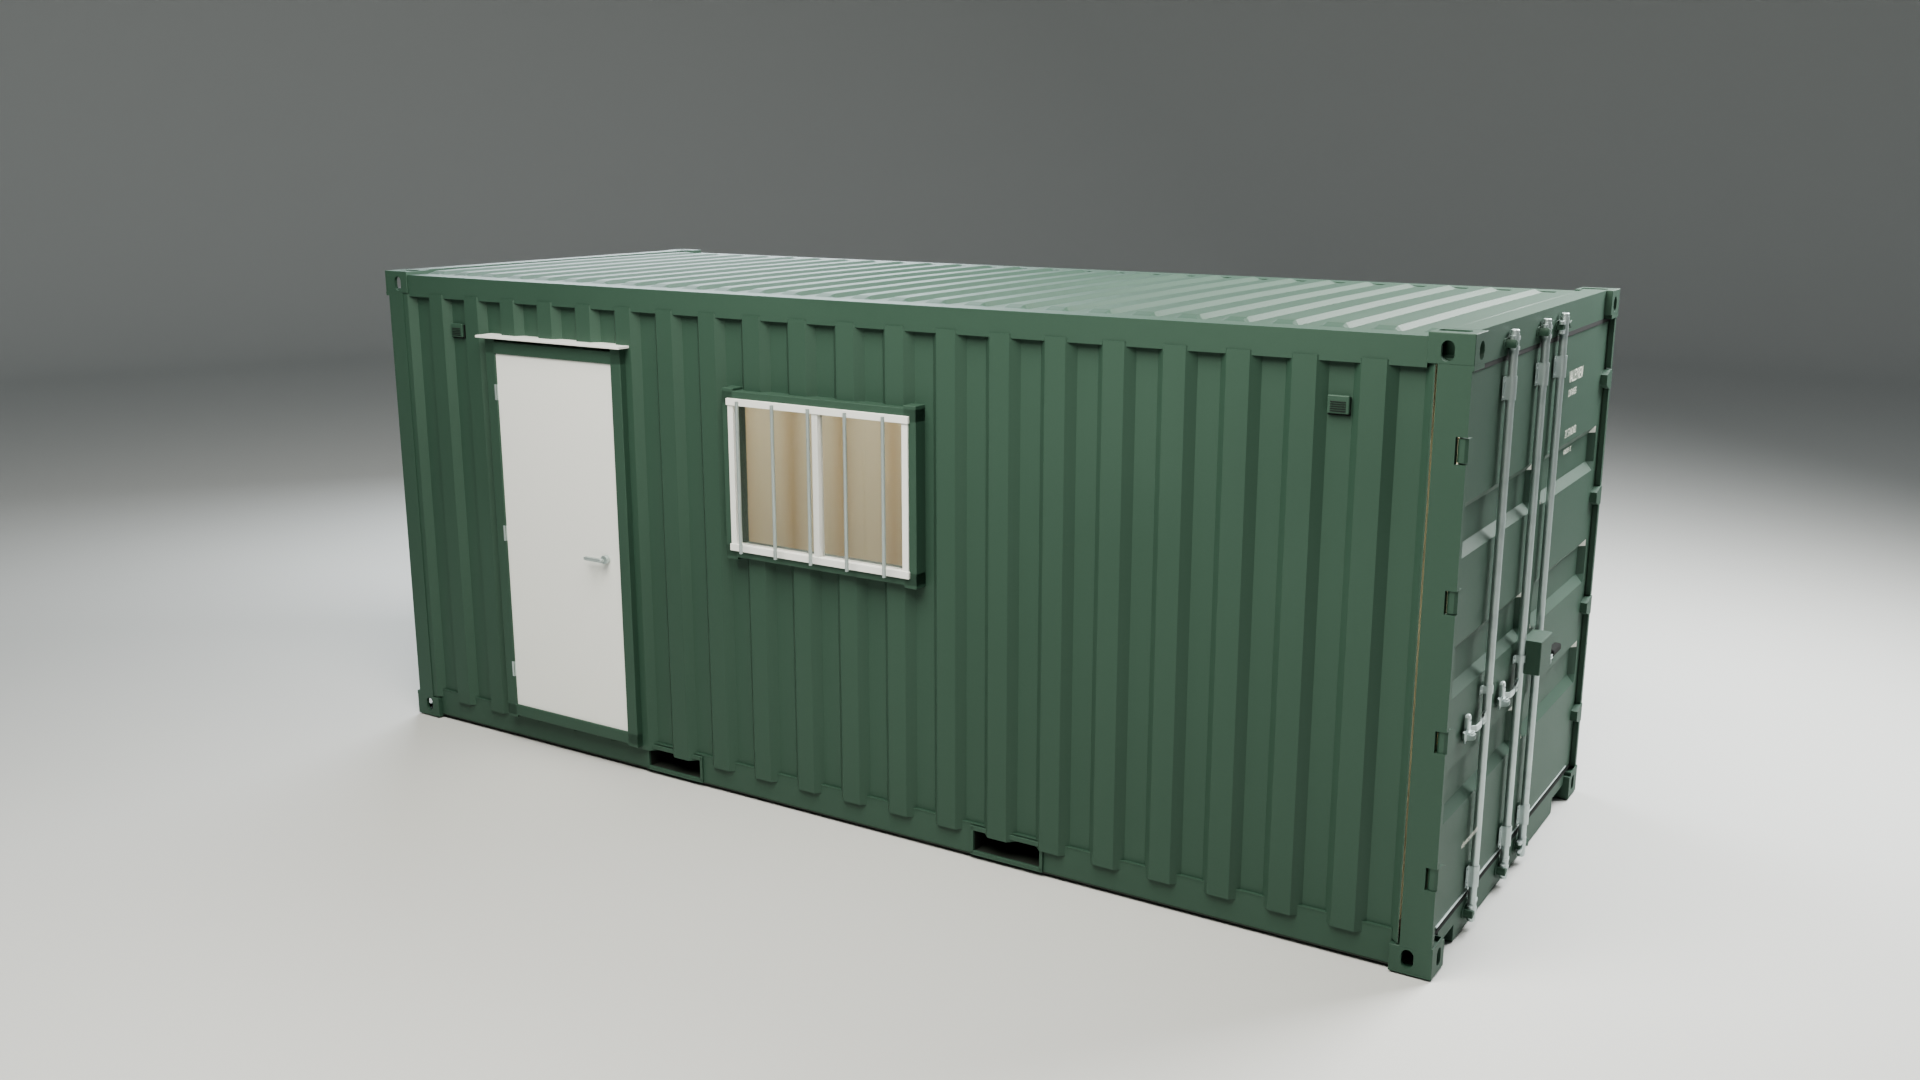
Short answer: decide what the container is for, then work through the choices in order. Size, new or used, where the door and windows go, which end the cargo doors face, framing and insulation, power, and the items that need a quote. Check local rules and delivery access before you order. You can make every one of those choices for free in the Valleyview Container Studio, a 3D container builder that runs in your browser. There is no sign-up to design. Your name, email and phone are asked for only when you send the design for a quote, download the build summary or save the tour video.
We modify containers in our yard in Kamloops, BC, and deliver across BC. You can design from anywhere in Canada; for a site outside BC, freight to your site is quoted per project as its own line. This guide walks through each decision the way we would on the phone, with the reason behind it.
The short version
- Decide what the container is for
- Pick the size
- Choose new or used
- Place the door and windows
- Pick the cargo-door end
- Choose framing and insulation
- Plan the power
- List what needs a quote
- Check local rules
- Check delivery and site access
Then design it in the Valleyview Container Studio and send it for an itemized quote.
1. Decide what the container is for
Every other choice follows from this one. A container that holds tools in a farmyard, one that holds a desk and two people all winter, and one that someone sleeps in are three different designs, even when the steel box is the same.
- Storage. Usually no insulation. Think about the cargo doors, a lock box and airflow. A personnel door saves opening the big doors every day.
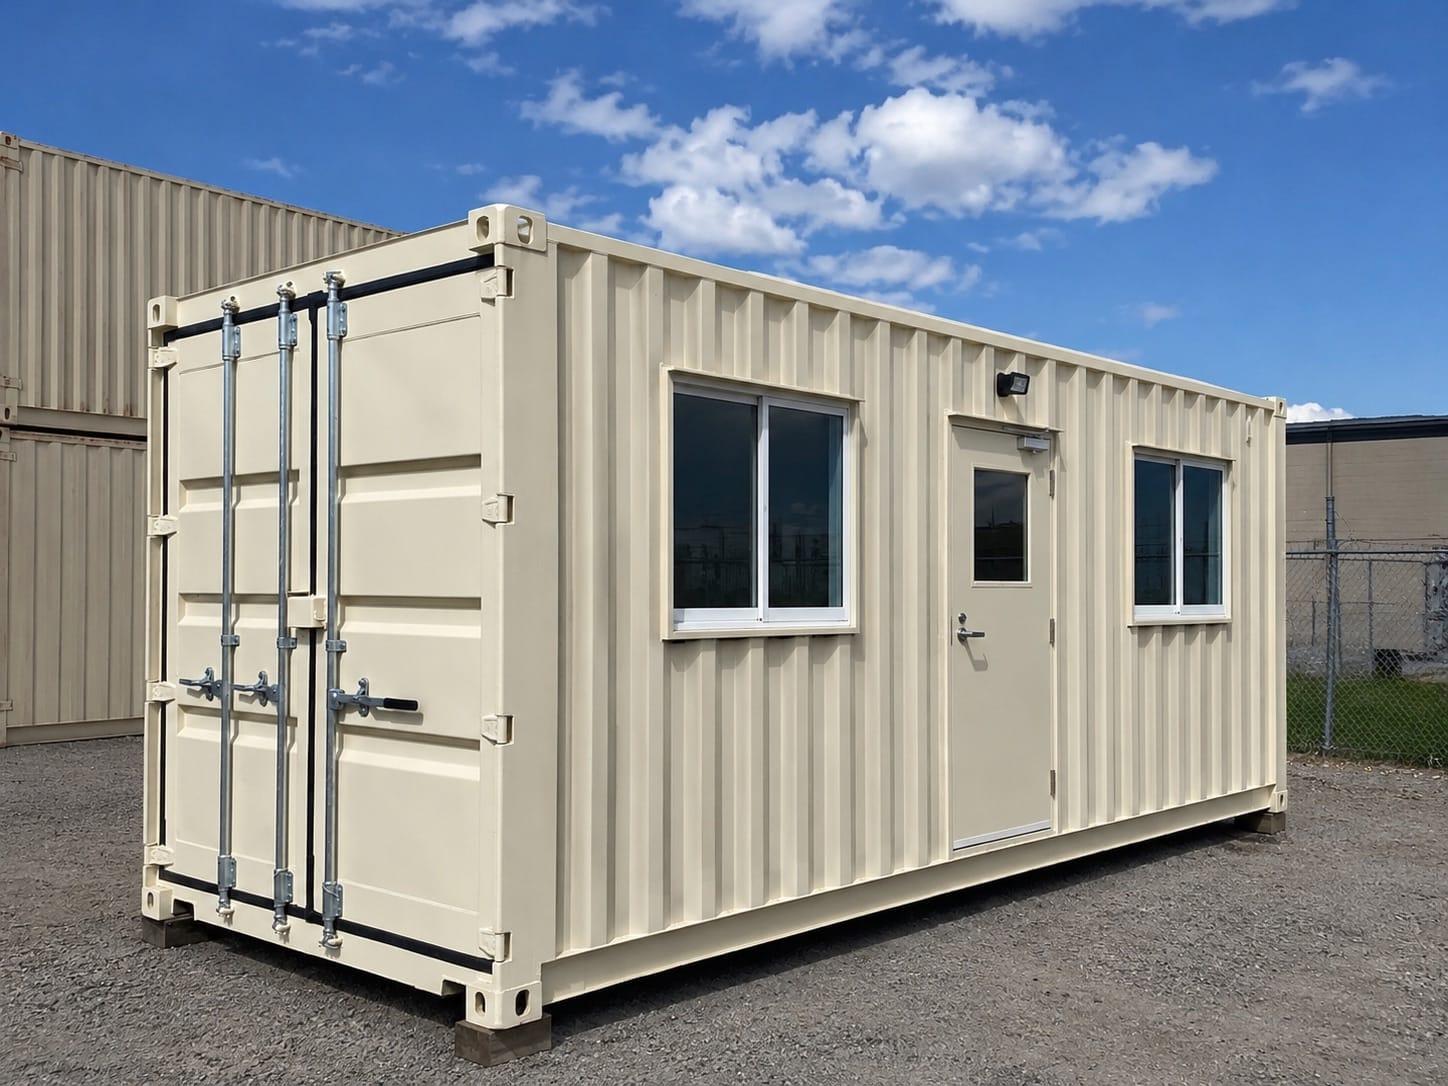
- Site office or workshop. A personnel door, windows, framing, insulation and power, plus heat if it is used in winter. See container offices and container workshops.
- Bunkie, cabin, garden suite or home. Someone sleeps there, so insulation, ventilation, plumbing and the local approval process matter most. These are quoted per project. See bunkies, garden suites and container homes.
- Shop, kiosk or equipment enclosure. Openings matched to the counter or the equipment, with ventilation and power sized to what is inside. See pop-up retail and equipment enclosures.
Before you open any designer, write down four things: how you will use it, how many people will be inside, whether it will be heated in winter, and where the power will come from.
2. Pick the size: 10ft, 20ft or 40ft high cube
The Container Studio models three sizes, and between them they cover most custom builds.
| Size | Suits | Keep in mind |
|---|---|---|
| 10ft standard | A small storage room, a compact tool or equipment room, a tight corner of a lot | New only in our catalogue; one sliding window in the studio |
| 20ft standard | Site offices, workshops, storage, a one-room cabin | The common size, and easier to place on a tight site than a 40ft |
| 40ft high cube | Two-room offices, larger workshops, garden suites and homes | Twice the floor of a 20ft and a foot taller than a standard container; needs more room for delivery |
A high cube is one foot taller than a standard container and no longer. Once the walls and ceiling are framed and insulated, that foot is the difference between a room that feels low and one that does not, which is why we build garden suites and homes on a 40ft high cube. The trade-offs are in our guides to 20ft vs 40ft containers and high cube vs standard containers.
Need a size the studio does not model, such as a standard-height 40ft, a side-door or double-door unit, or a refrigerated container? Design the closest studio size and tell us which container you want. The full range is on our containers page.
3. Choose new or used
Both take the same modifications. The difference is how the box looks and how long it will be on show.
- New (one-trip). Straight walls and factory paint, with one trip of cargo behind it. Suits a permanent office, a cabin, a suite or anything customers see. The 10ft is new only.
- Used. Inspected and wind and watertight, with the dents, faded paint and old markings of a working life. Suits a jobsite office that moves, a workshop, or storage where looks matter less.
In the studio, a used container carries representative wear, not a portrait of a particular unit; our yard inventory shows actual units. Colour is a preference: forest green, container white, graphite, sandstone or coastal blue. Availability and any paint cost are confirmed in your quote. Our condition grades guide explains one-trip, cargo-worthy and wind and watertight.
4. Place the door and windows, and keep steel around them
A shipping container is strong because of how its steel is arranged. The four corner posts and the rails along the top and bottom carry most of the load, and the corrugated walls stiffen the box between them. Cut a hole in a wall and you remove some of that steel, so every door and window gets its own steel frame, and openings stay clear of the corner posts and of each other. That is why the Container Studio will not let a window slide into a corner post or overlap the door.
Where to put them:
- The door where you walk up. Usually on the long wall facing your path, driveway or work area.
- Windows for light and air. Windows on opposite walls let air move through. A window beside a desk or workbench puts the light where you work.
- Wall space for what goes inside. Shelving, a bench, a bed or a counter needs unbroken wall. Sketch the furniture before you place the openings.
- Security. Our sliding windows come with screens and security bars, and the 36-inch steel personnel door has a commercial lockset.
Decide before anything is cut. Moving a hole in steel afterwards is a big job, so settle the positions on a screen first. In the studio you add a steel personnel door and up to two sliding windows (one on a 10ft) and drag them along either long wall, in 3D or on the floor plan, and each position is written into your build summary. Need more openings, a roll-up door or a serving window? Lay out what the studio allows and tell us the rest; those are quoted per design.
5. Pick the cargo-door end and how it sits on your site
The original cargo doors stay at one end: two hinged steel doors that swing out. That end needs clear, level ground in front of it so both doors open fully, and it usually faces the driveway or yard where you load. In the studio you can move the whole cargo-door assembly to either end on the floor plan, so the personnel door and windows land where you want them relative to it.
Then think about how the box meets the ground. A storage container sits on a firm, level, well-drained base with support under the corners. An office, cabin or home may need a foundation designed for your soil and frost, so ask whoever is drawing it. Which way the container faces is confirmed with the driver at delivery: the truck backs in on a straight line and the container slides off the back, so the spot and the door direction have to suit that approach.
6. Choose framing and insulation, and plan for condensation
Steel moves heat quickly. When warm, moist air inside a container meets a cold steel wall, water condenses on the steel, the way a cold glass sweats on a summer day. Left alone, that water drips, stains and soaks whatever is behind the wall. Good insulation keeps warm air off the cold steel, and good framing tolerates the moisture that gets through anyway.
Framing
- Steel stud framing. Our standard for insulated builds, because it does not rot, swell or feed mould.
- Wood framing. Costs less, but we do not recommend it where moisture is a concern, such as a space heated all winter.
Insulation
- Rigid foam board. Our default for offices and workshops. Board does not follow the corrugations, so the seams are taped and foamed.
- Closed-cell spray foam. Bonds to the steel and fills every corrugation as a full air seal, with the highest R-value on our list. The pick for space occupied year-round in a cold climate; it also takes a little more interior width.
- Rock wool. Resists fire and dampens sound, useful beside a generator or noisy equipment. As a batt it needs a vapour barrier.
- Fibreglass batts. Available, but not our preference in a steel box, because batts can hold condensation against the steel.
- Undercarriage foam. Closed-cell foam sprayed under the floor for cold ground and frost-heave sites, added to any of the above.
For a container you will not heat, airflow matters more than insulation. Our guide to insulating a shipping container covers both, and how much headroom each method takes.
7. Plan the power
Decide early where the power will come from, whether a utility service, a temporary construction service or a generator, because it shapes the panel, the circuits and where the cable comes in.
Basic electrical package. 100A panel, 4× LED interior lights, 4× 15A receptacles and an exterior weatherproof outlet, roughed in by a licensed electrician we contract, ready for your electrician's final hookup. On site, a licensed electrician in your area connects the panel to your power and arranges whatever inspection your area requires.
HVAC pre-wire. Dedicated circuit and wall penetration for a mini-split or rooftop HVAC unit. Add it if you plan heat or air conditioning, so nobody has to cut steel on site when the installer arrives. The unit itself is quote required.
An electric heater or other heavy load needs its own circuit, so list everything you plan to plug in when you send the design.
8. Know what needs a quote, and why
Some choices cannot be priced from a menu because they depend on your site, your services and your taste. The studio lists them on your build, marks them Quote required and keeps them out of the subtotal rather than guessing.
- Wall and ceiling finishes, and flooring. Drywall, plywood or PVC on the walls and ceiling, and vinyl flooring. The material and how hard the space is used set the price.
- Washroom and mechanical room. A partitioned washroom with a toilet, vanity and shower, and a mechanical room with fresh-water and waste tanks, a water heater and a pump. Connecting to water and sewer or running on tanks changes the whole design, and the connections on site are made by licensed trades in your area. In the studio, the two together need a 20ft or 40ft.
- Heating, cooling and ventilation. A mini-split, baseboard heat and an extractor fan are sized for your climate, your insulation and how the space is used.
- Anything outside the studio. Roll-up doors, extra or larger openings, partition walls, a roof, cladding and decks are quoted per design.
Homes, garden suites and bunkies are quoted per project and never carry a published price, because the design, engineering and drawing work an occupied build may need is different every time. You can still lay out the shell in the studio and send it.
9. Check local rules before you order
We will not tell you what your local rules are, because they are not ours to state. Rules for containers are set locally and vary by province and municipality, sometimes from one zone to the next in the same town. The people who can answer are at your municipality or other local authority. Ask them:
- Is a shipping container allowed on my property, and does my zone limit where it can sit?
- Does how I will use it, as storage, a workspace or somewhere to sleep, change what you need from me?
- What setbacks or lot coverage limits apply?
- Do you need drawings or other documents, and for what?
- Do the electrical and plumbing connections need their own permits or inspections?
Note who you spoke to and the date, and get any answer that matters in writing. For BC sites, our guides to shipping container permits in BC and container home permits in BC cover what to ask and who to call.
10. Check delivery and site access
A layout that works on screen still has to reach the spot. We deliver across BC by tilt-deck truck: the deck tilts and the container slides off the back onto your prepared base. The truck needs a straight, clear path to back in, firm ground, and room overhead clear of wires and branches, and a 40ft needs more room than a 20ft. After you send your design, email photos of the spot and the route to valleyviewcontainers@gmail.com, and we check access before quoting. Our BC delivery guide covers what the truck needs.
Designing from outside BC
You can design in the Container Studio from anywhere in Canada and send the design to us. The container is built in our Kamloops, BC yard. For a site outside BC, freight or delivery to your site is quoted per project as its own line on your quote, so include your town or city and province when you send the design. Local rules vary by province and municipality, so confirm what applies with your local authority before you order, as you would anywhere.
Design it in the Valleyview Container Studio
The Valleyview Container Studio is a free 3D container builder, a shipping container configurator that runs in your browser, for the builds we make in Kamloops. It walks you through the decisions above in order and draws the result as you go. There is no sign-up to design: open it and start. Your name, email and phone are asked for only when you send the design for a quote, download the build summary or save the tour video.
- The container. A 10ft standard (new only), 20ft standard or 40ft high cube, new or used, in one of 5 colour preferences.
- The openings. Drag a steel personnel door and up to two sliding windows (one on a 10ft) along either long wall, in 3D or on the floor plan, and move the cargo doors to either end.
- The build. Wood or steel stud framing; rigid foam, closed-cell spray foam, rock wool or fibreglass batts; undercarriage foam; the basic electrical package and an HVAC pre-wire.
- The quote items. Wall and ceiling finishes, vinyl flooring, a washroom, a mechanical room, a mini-split, baseboard heat and an extractor fan, listed on your build and kept out of the subtotal.
- Seven views. Exterior, side, cargo doors, inside, roof, base and back.
- A 30-second tour of the build you configured, which you can save as a 1920×1080 video where your browser supports recording.
- A running estimate from the same price list our yard quotes from.
- A link to share. “Copy link to this design” gives you a link that reopens the exact build, with no personal details in it, to send to a partner, contractor or family member.
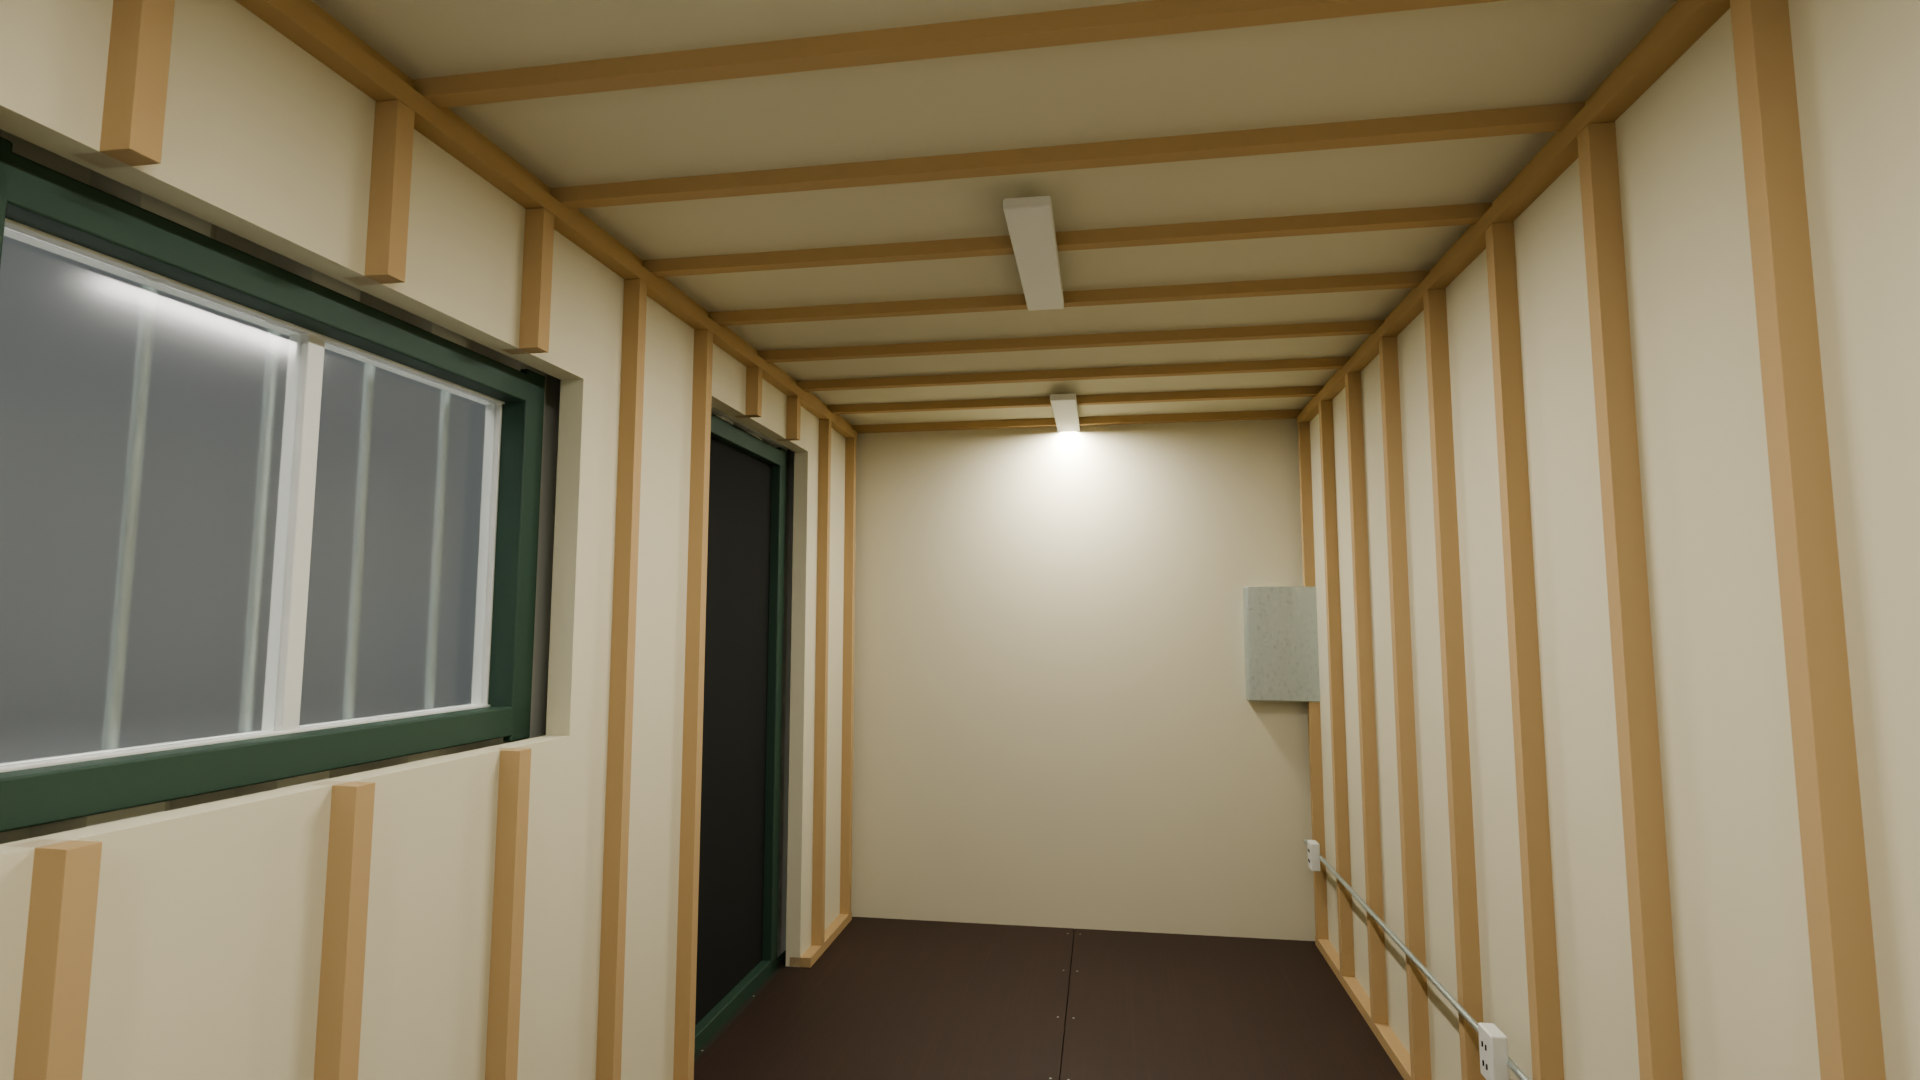
Nothing is ordered or paid for inside the studio. When the design looks right, send it from the review step, and our team in Kamloops replies within one business day. Your itemized quote covers the container, each modification and delivery to your site. You can keep changing the design after you send it; nothing is built until you approve a written quote. The studio is a visual configurator, not a construction drawing, so final fitment is confirmed in that quote.
Prefer to talk it through?
Call (778) 694-4050 or send a sketch through the quote form. Tell us what the container is for, where it is going and roughly where the openings should be, and we will price it line by line.
Designing a container, start to finish
Start with the use, let it pick the size and condition, put the openings where you will actually walk and work, insulate for the climate and how the space is heated, and plan the power before the walls close. Then check the local rules and the route in. Lay it out in the Container Studio, share the link with whoever you are building with, and send it when it looks right.
Every build we do is on the custom solutions hub, the full line-item menu is on our modifications and pricing page, and photographs of finished work are in the project gallery.
Custom Solutions
Custom container solutions, built in Kamloops
Custom containers for work and for living: site offices, workshops, farm storage, cold storage, pop-up shops, bunkies and turnkey container homes — designed around your project, built in our own yard and delivered anywhere in BC. Insulated site offices from $14,600 CAD; bunkies and modular homes are quoted per project.